First steps with django project includes setting up superuser, getting your admin site running and create necessary apps.
If you think django installation should be included in the list as well, you can follow this tutorial. I have also covered connecting MySQL with your Django App previously.
So, What exactly is a Django App?
If you can divide your django project in multiple logical blocks, each such block should be considered as an app.
In other words, when we are developing a website in Django, this website should have an admin area, one main website section and may be a blog section. We can have a separate app for each such sections.
Ideally, each django app will have it’s on urls, model, filters, forms and views files. Django already comes bundled with a very impressive admin section out of the box, therefore, we only need to have one app in our django project.
Let’s create first app in our django project which was created in last tutorial. Once we are in the virtual environment with workon django-project, we should cd into the project directory and then run py manage.py startapp application where “application” is the name of the application and could be anything of your choice.

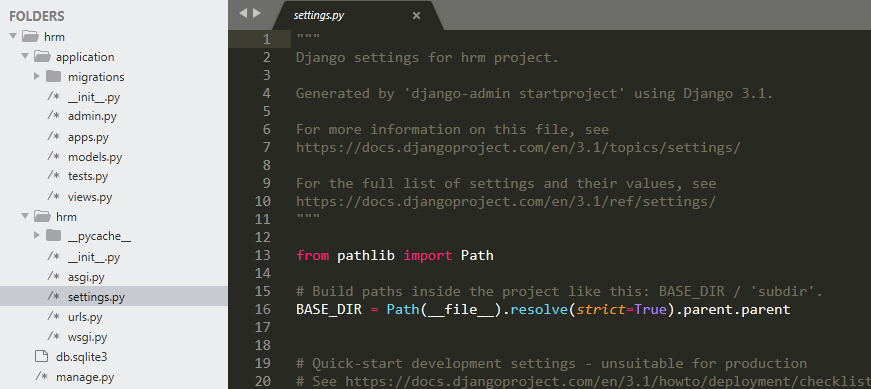
We can see that we now have the “application” folder available inside the project folder.
admin.py, models.py and views.py are some important files inside our application.
Creating Super User in Django using createsuperuser command
By this time, if you browse https://127.0.0.1:8000/admin, Django will ask you to login. When we ran first migration, django had already setup all the authentication logic and tables for us. It had also setup the Django admin app for us.
In order to login to our django admin app, we need to have a super user. Django provides us with a handy functionality through manage.py utility. While inside your project folder, type py manage.py createsuperuser. This will prompt you for username, email and password.

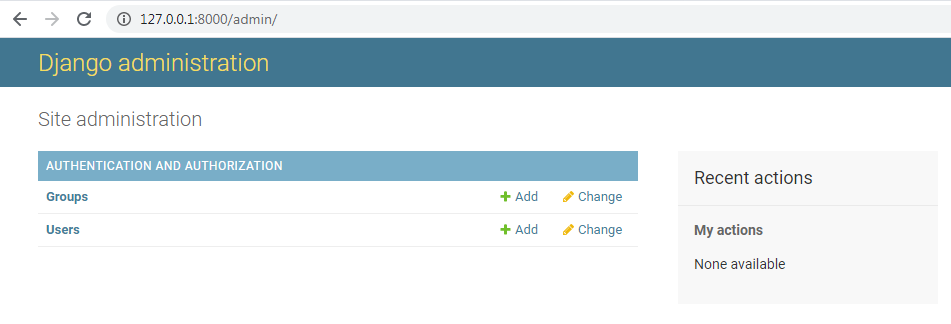
Once the super user created, you can login to admin area. You should see the screen as shown above.

